 This article shows how to add an image to a view in an Eclipse RCP application and builds off of a clean RCP Application with a View. Images used in an RCP application are managed by an ImageRegistry that is global to the scope of a plugin. If your project has a class that extends AbstractUIPlugin, then there is a static method you can use called getImageDescriptor() to access ImageDescriptors given a path to the image. The Activator class ectending AbstractUIPlugin is automatically generated if you used the wizard to create a Hello World Eclipse RCP Application. The ImageRegistery is the preferred means of handling images in your application because it handles the lazy loading of the images and disposes of them properly when needed. The image is added to a view by adding a canvas to the view's parent composite and adding the image from the image descriptor to the canvas through its addPaintListener method. It may sound confusing, but in practice it's really simple.
Step 0: Create a Hello World Eclipse RCP Application and add a View to it.
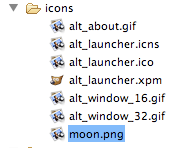
Step 1: Add the image into the RCP plugin project. In this example an image called moon.png is added to the "icons" folder inside the plugin project. Whether you use this folder or not is really not important - you can organize your images any way you want. In the next step, the path to the image's location is used to get the image.

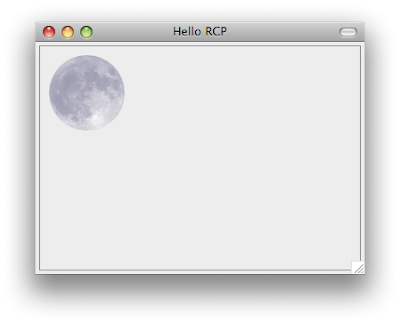
Step 2: Add the image to the view. In the view's class where you want the image to appear, add a global Image field and set it in the view's constructor calling the Activator.getImageDescriptor("icons/moon.png").createImage(); method. Adjust the path accordingly to locate your image. The path is relative to the plugin. In the createPartControl method, add a Canvas to the view's parent Composite and define its PaintEvent to draw the image. In the drawImage method, give it the image and the x and y coordinates where it should be drawn.
package com.blogspot.obscuredclarity;

import org.eclipse.swt.SWT;
import org.eclipse.swt.events.PaintEvent;
import org.eclipse.swt.events.PaintListener;
import org.eclipse.swt.graphics.GC;
import org.eclipse.swt.graphics.Image;
import org.eclipse.swt.widgets.Canvas;
import org.eclipse.swt.widgets.Composite;
import org.eclipse.ui.part.ViewPart;

public class MainView extends ViewPart {

public static final String ID = "com.blogspot.obscuredclarity.mainView"; // the ID needs to match the id set in the view's properties

private Image image;

public MainView() {

image = Activator.getImageDescriptor("icons/moon.png").createImage();
}

@Override
public void createPartControl(Composite parent) {

// Create the canvas for drawing
Canvas canvas = new Canvas( parent, SWT.NONE);
canvas.addPaintListener( new PaintListener() {
public void paintControl(PaintEvent e) {
GC gc = e.gc;
gc.drawImage( image,10,10); // Draw the moon
}
});
}


public void setFocus() {}

}
Step 3: Run the application and test if everything worked. Your application should now have an image in the view and look something like this:
 Piece of cake!!
<--- Previous - Add a Custom Menu Action to an Eclipse RCP Application
---> Next - Import and Export an Eclipse RCP Application Project
Also see: Eclipse RCP Tutorial Table of Contents
1 comment:
Hi thanks fr the tutorial helped me a lot..
Post a Comment