This article shows how to upgrade the hard drive in a Macbook while keeping all existing files, software, settings, and preferences intact.
First, a note about MacBooks and hard drive capacity. The info out there in the interwebs regarding the maximum HD capacity a MacBook can be upgraded to in unclear. In my experience, upgrading above 250GB is ill-advised, however many people have left comments that they've had no problems at all. In a previous article I wrote,
500GB MacBook Harddrive Upgrade for Under $100, the issue came up from some commentors that the hard drive controllers in certain MacBook motherboards couldn't handle HDs with more than 250GB capacity. The upgrade and subsequent use will work, but when the HD starts to fill up to the ~250GB level, problems and perhaps data corruption/loss will occur. I was able to verify this with Apple, that for my MacBook, greater then 250GB wouldn't be a good idea, but for other newer models it is OK. How to tell which models can be upgraded to what, I couldn't find out. After learning this, I chose to downgrade the 500GB HD in my MacBook which I installed previously and use that as an external data backup device.
Disclaimer: Before you attempt this, backup all your data! Perform this upgrade at your own risk. This worked for me, but I can't guarantee it will work for you! Consider any warranty issues this might cause and call Apple first to see if this will void your warranty and/or AppleCare Protection Plan. Take Electrostatic Discharge (ESD) precautions when handling the hard drive out of it's case or handling any raw circuitry with with your hands. It's never a good idea to directly touch electrical components on a Printed Circuit Board (PCB), but having said that, if you are properly grounded no damage will occur. All you need to do is touch something connected to the ground with your finger to neutralize any static charge your body may be holding before you touch the electronics. If you're not sure of what you're doing, proceed with caution (but do proceed so you learn something new)! I performed this upgrade on my all-white MacBook I bought in October 2007, which is running Mac OSX 10.5.5.
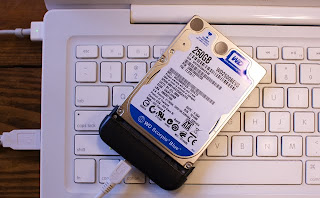
Step 1: Buy a 150GB internal laptop hard drive and an external hard drive enclosure. What's important is the HD needs to have a 2.5 inch form factor and a SATA 2 interface. The enclosure must be the USB/SATA type. The exact hard drive and hard drive enclosure I used were:
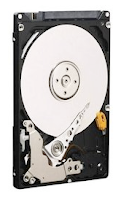 Link: Western Digital Scorpio
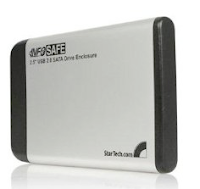 Link: StarTech InfoSafe
Step 2: Connect the hard drive to a free USB port using the USB to SATA connector that is part of the external HD enclosure. Simply connect the HD to the USB/SATA connector and plug the connector into your computer using a USB cable.
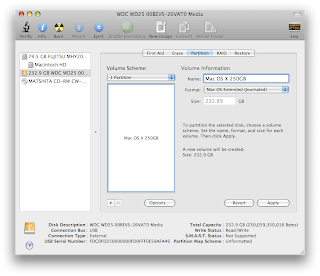
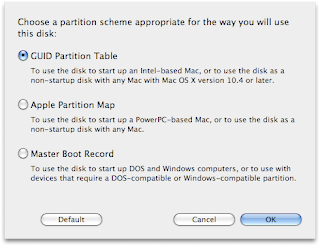
Step 3: Partition the external drive as a GUID Partition Table drive. The drive must be partitioned this way if you ever want to upgrade the OS in the future for an Intel-based Mac. Open Disk Utility and select the external hard drive in the left column. Select the "Partition" tab. Select "1 Partition" as the Volume Scheme. You can give the volume a name now if you like, but you can always change it later. Choose "Mac OS Extended (Journaled)" as the Format. Click on the "Options..." button and choose the "GUID Partition Table". Click "OK" and then "Apply".
Step 4: Use SuperDuper! to clone your current bootable harddrive image to the external drive. This free software will quickly and easily make an exact copy of your current OS image including all your software, existing files, settings, and preferences - it only takes a few clicks.
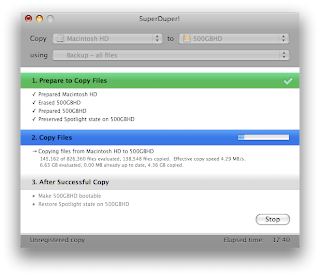
With the external harddrive plugged in the USB port, run SuperDuper! Select: Copy "Macintosh HD" to "250GB HD" (or whatever it's named in your case) using "Backup - all files" and click the "Copy Now" button. After an hour or so depending on how much data you have, the external hard drive will be an exact copy of the hard drive inside your MacBook. While you're waiting, you could check out How to Build a 24-Core Linux Cluster in a $29.99 IKEA Cabinet or How to Identify Bacteria on Your Hands Using DNA Sequencing. Once the cloning is complete you can do a test and boot from the newly created bootable image on the external hard drive by restarting your MacBook and holding the option key. This will let you choose which disk you'd like to boot from. You should be able to boot from the external hard drive at this point and it will look like you booted from the internal hard drive that you just cloned.
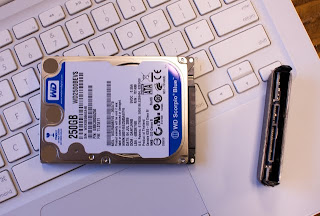
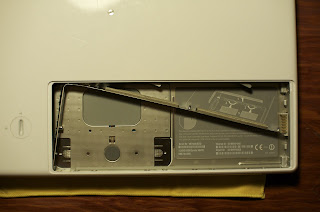
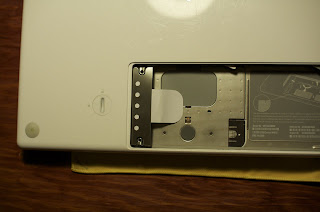
Step 5: Swap the external hard drive with the internal hard drive. Apple made it very easy to replace hard drives on the MacBook. By the way, for this step, unplug the power from your laptop and shut the computer down. For a complete guide how to do this, you can download Apple's Hard Drive Replacement Instructions. First, remove the battery on the bottom of the laptop using a coin to unlock it. With the laptop flipped upside down and the battery removed, unscrew three little screws using a small Phillips head screw driver that hold a retaining clip. You don't have to fully remove the screws from the retaining clip to remove it. Once the retaining clip is removed, fish out the white plastic flap and pull to slide out the internal hard drive.
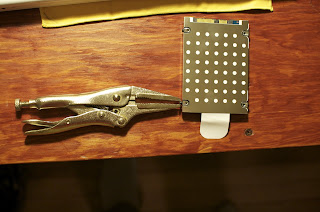
With the old hard drive out, remove the metal sheath from it by taking out the four screws. The screws require a star-tipped screwdriver. Because I didn't have that, I just used a pliers to grab onto the screw heads and twist them out. With the old hard drive now completely out, take the new one and in reverse order of taking the old one out, put the new one in.
Step 6: Turn on your MacBook and enjoy your extra space. After you reassembled your MacBook, you should just be able to turn it on like normal and it will boot up from the newly-installed 500GB hard drive. Everything will look and behave just like before except now you'll have tons of extra space! You can right click on the hard drive in Finder and choose "Get Info" and rename the hard drive to something like "MacBook HD" if you like.
Step 7: Put the external HD case to good use. Either put the old hard drive into the external HD case and use it for a file backup or get an additional 250GB HD for the case and regularly use SuperDuper! to clone the internal 250GB HD onto the external one. That way if your internal HD ever dies, you have a clone ready to swap into your MacBook in about 5 minutes and continue with your work right where you left off!
Piece of cake!!
 The climbing in the Dresden, Germany area has not followed the flashy modern ways of most other climbing venues. No chalk, no bolts, no top-roping, no nuts, no cams. While modern climbing harnesses and shoes are now common sights in Bielatal, you might be chased out of the woods if you're seen using the aformentioned items. Part tradition and part protecting the soft sandstone, the modern metal climbing gear found hanging on people's harnesses in every crag in America is not allowed in Beilatal. Watching the locals climbing with just a rack of slings and biners is a humbling experience.
 Several sandstone towers reach above a forested ridge a few kilometers from the Czech Republic.
 Most of the routes follow flaring crack systems.
 Most routes are lead and the followers are top-belayed to prevent rock-damaging rope drag.
 The first follower trailing a rope for the next.
 Slings with knots tied in them for protection.
 Heike demonstrates the "fling" technique. Tie the perfect size knot one-handed on lead, and fling it in the crack above your head until it catches.
 One of the few "bolts" seen in the rock.
 Each tower has its own register book in specially created metal boxes on the top, which you must sign. It's very important to document who lead the route and who top-roped. And most importantly, use the supplied straight edge to draw a horizontal line under your party's entry.
 Kicking back on the top. Berg Heil!


