 Because of the following two warnings, I created a new article containing easier upgrade instructions and addressing the issue of the 250GB limitation in some MacBooks: MacBook Hard Drive Upgrade Instructions
Warning #2! (Also see warning #1 directly below.) On July 30, 2009, cjewelz left a comment below saying that he called Apple AS centre about the maximum size they would recommend upgrading to and they said 320 GB. According to cjewelz they said upgrading to 500GB would cause overheating. My MacBook has not had any overheating issues with a 500GB HD. However, I contacted Apple, and what they told me is that my MacBook can be upgraded to a maximum of only 250GB because the HD controller on the motherboard can only handle up to a 250 GB hard drive. I guess this means that when my 500GB HD fills up to ~250GB, weird stuff will occur and my HD will possibly be corrupted and un-useable. I remember calling Apple around the time that I did the upgrade asking about upgrade options and they told me that they could only upgrade to 250GB, but if I brought in a 500GB HD, they would install it for me (for some cost). Hmmm... Mixed messages... So it seems like a 250GB or less upgrade is OK, a 320GB may be not OK, and 500GB is bad. I haven't yet found any website which lists MacBook hard drive size limits according to the different MacBook models. If I get a more concrete understanding of the HD size limitations, I'll post the information so others have it and link to it from here. Proceed with caution.
Warning#1 As of February 25th, 2009, two readers have left comments regarding the Western Digital 500GB Passport Essential external harddrive featured in this article. Apparently the design of the HD has been changed, and you can no longer disconnect the SATA to USB connector from the main harddrive because it is manufactured as one piece. One reader reports a one-piece HD bought in the UK and dated January 2009. If you end up with one of the one-piece HDs, you won't be able to successfully complete the upgrade as described in this article.
However, most of this article is still relevant as reader Zack pointed out. Here is his comment: "Even though the Passports are not compatible anymore this upgrade is still easy and very affordable. I opted to get a drive and enclosure separately rather than the passport and spent $107.68. The quality of the enclosure may not be as good as the Passport enclosure but it's still really small and nice enough. I still recommend and encourage this upgrade and just told someone else about it today."
Following is a hard drive and an enclosure that would work for the upgrade. What's important is the HD needs to have a 2.5 inch form factor and a SATA 2 interface. The enclosure must be the USB/SATA type.
 Link: Western Digital Scorpio
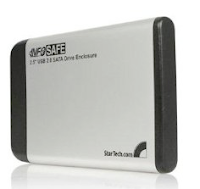 Link: StarTech InfoSafe
Start of original article:
The 80GB harddrive that came with my white MacBook I bought a over a year ago (October, 2007) has become the limiting factor of my computing productivity. For example, if I want to tap into my entire mp3 collection through iTunes and have all my pictures in iPhoto while I use the computer, I'm well over 80 GB and am forced to use an external harddrive. With only two USB ports on a MacBook and one of them taken up by an external harddrive, I'm constantly swapping peripheral device USB cables in the remaining port. I love everything else about my MacBook and wouldn't want to upgrade my entire computer yet, and a 500GB harddrive would extend my use of it for at least two more years. Faced with this challenge, I set out to do the upgrade myself and avoid the offensive fees Apple would charge for the upgrade to a maximal measly 250GB.
In a nutshell, to upgrade to a 500GB harddrive on your MacBook while keeping all your existing files, software, settings, and preferences intact for less than $100, follow these simple steps:
- Buy a 500GB external harddrive for ~$150 or less.
- Partition the external drive as a GUID Partition Table drive
- Use SuperDuper! to clone your current bootable harddrive image to the external drive
- Disassemble the external hardrive enclosure
- Swap the external harddrive with the internal harddrive
- Turn on your MacBook and enjoy your extra space
- Repackage the old harddrive into the external harddrive enclosure
- Sell your 80GB external harddrive on Craigslist or eBay for ~$50
Warning: Before you attempt this, backup all your data! Perform this upgrade at your own risk. This worked for me, but I can't guarantee it will work for you! Consider any warranty issues this might cause and call Apple first to see if this will void your warranty and/or AppleCare Protection Plan. Take Electrostatic Discharge (ESD) precautions when handling the harddrive out of it's case or handling any raw circuitry with with your hands. It's never a good idea to directly touch electrical components on a Printed Circuit Board (PCB), but having said that, if you are properly grounded no damage will occur. All you need to do is touch something connected to the ground with your finger to neutralize any static charge your body may be holding before you touch the electronics. If you're not sure of what you're doing, proceed with caution (but do proceed so you learn something new)! I performed this upgrade on my all-white MacBook I bought in October 2007, which is running Mac OSX 10.5.5.
Step 1 - Buy a ~$150 2.5 inch form-factor 500GB external harddrive. The key is to buy one that has a SATA interface, which the vast majority do these days. You can find a good deal on a 500GB harddrive online from a reputable dealer such as Amazon.com. I ended up getting a Western Digital My Passport Essential because the price was right and I figured I could disassemble the enclosure pretty easily. With enough patience and searching, you can find this harddrive for under $150 on websites with special promotions. Update: as of Jan. 26, 2009, 500GB Western Digital My Passport Essential HDs cost only ~$115 on Amazon.com.
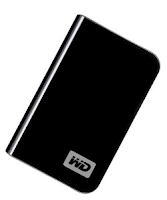 Link: Western Digital My Passport
Step 2 - Partition the external drive as a GUID Partition Table drive. Eric left a comment down below that pointed out you need to have the drive partitioned this way if you ever want to upgrade the OS in the future for an Intel-based Mac. Thanks, Eric! Plug in your new external harddrive to a free USB port. Open Disk Utility and select the external harddrive in the left column. Select the "Partition" tab. Select "1 Partition" as the Volume Scheme. You can give the volume a name now if you like, but you can always change it later. Choose "Mac OS Extended (Journaled)" as the Format. Click on the "Options..." button and choose the "GUID Partition Table". Click "OK" and then "Apply".


Step 3 - Use SuperDuper! to clone your current bootable harddrive image to the external drive. This free software will quickly and easily make an exact copy of your current OS image including all your software, existing files, settings, and preferences - it only takes a few clicks.
 With the external harddrive plugged in the USB port, run SuperDuper! Select: Copy "Macintosh HD" to "500GBHD" (or whatever it's named in your case) using "Backup - all files" and click the "Copy Now" button. After an hour or so depending on how much data you have, the external harddrive will be an exact copy of the harddrive inside your MacBook. While you're waiting, you could check out How to Build a 24-Core Linux Cluster in a $29.99 IKEA Cabinet or How to Identify Bacteria on Your Hands Using DNA Sequencing. Once the cloning is complete you can do a test and boot from the newly created bootable image on the external harddrive by restarting your MacBook and holding the option key. This will let you choose which disk you'd like to boot from. You should be able to boot from the external harddrive at this point and it will look like you booted from the internal harddrive that you just cloned.
Step 4 - Disassemble the external hardrive enclosure. The construction of harddrives will vary, but whether it's held together by screws or just snapped together, you can probably get it apart one way or another. For the Western Digital My Passport Essential, you need to insert your fingernail or a knife between the top an bottom faces and the long side and pop the pieces apart a bit.


You need to loosen all the snaps all along the long edge, BUT NOT on the shorter edges. After the long edge is loose, gently slide the inner part out of the enclosure. I found it a bit difficult to get the sliding started so I helped it along with by twisting the tip of a flat head screw driver between the inner part and the edge of the cover. As with most things in life, having patience and not forcing things is the key to achieving your goal.


Next, carefully remove the plastic piece encircling the harddrive noting how all the pieces fit together so you'll be able to reconstruct everything with the old harddrive later. Slide the harddrive out of the metal sheath and very very carefully detach the USB connector from the SATA power and data terminals on the harddrive. You might want to use a thin blade and pry apart the connection right where they mate rather than torqueing on the USB PCB with your fingers.


Step 5 - Swap the external harddrive with the internal harddrive. Apple made it very easy to replace harddrives on the MacBook. By the way, for this step, unplug the power from your laptop and shut the computer down. For a complete guide how to do this, you can download Apple's Hard Drive Replacement Instructions. First, remove the battery on the bottom of the laptop using a coin to unlock it. With the laptop flipped upside down and the battery removed, unscrew three little screws using a small Phillips head screw driver that hold a retaining clip. You don't have to fully remove the screws from the retaining clip to remove it. Once the retaining clip is removed, fish out the white plastic flap and pull to slide out the old harddrive.


With the old harddrive out, remove the metal sheath from it by taking out the four screws. The screws are kinda funky because they require a star-tipped screwdriver. I just used a pliers to grab onto the screw heads and twist them out. With the old harddrive now completely out, take the new one and in reverse order of taking the old one out, put the new one in.
 Step 6 - Turn on your MacBook and enjoy your extra space. After you reassembled your MacBook, you should just be able to turn it on like normal and it will boot up from the newly-installed 500GB harddrive. Everything will look and behave just like before except now you'll have tons of extra space! You can right click on the harddrive in Finder and choose "Get Info" and rename the harddrive to something like "MacBook HD" if you like.
Step 7 - Repackage the old harddrive into the external harddrive enclosure. In reverse of how you disassembled the 500GB harddrive, reassemble the external harddrive package with the old 80GB harddrive being careful to gently put everything in place and slide it all together.
Step 8 - Sell your 80GB external harddrive on Craigslist or eBay for ~$50. Not only will you recoup some of the cost of the 500GB harddrive, but you'll be recycling by selling your perfectly good external harddrive to someone else who needs one. I would recommend using the Disk Utility and securely erase all the data on it though before selling it.
Piece of cake!
209 comments:
1 – 200 of 209 Newer› Newest»Isn't that 320gb, and isn't that right now the largest 2.5" HD?
Tim! Great post - I'm looking forward to trying this myself. I'm a bit of a novice techie though, so I had a suggestion (or a request, rather): would it be possible to add a few notes to the photos you've included, so that I know what you're referring to when you mention the metal sheath, etc.? Again, super neat trick, and thanks for posting.
Good eye! Yes, in the picture, the drive is a 320GB Western Digital Drive, but it's just for illustration. I already had my 500GB Western Digital hard drive installed in my MacBook and just used my 320GB external drive to make the pictures. The largest 2.5" hard drive that I know of is 500 GB. For example see: http://www.wdc.com/en/products/products.asp?driveid=525
so do all macbook pros come with a 2.5" drive. im actually looking for 1TB. does anyone know if that exits as a a replacement for macbook pro.
THANK YOU!
Do you know if the same can be applied to iMac, AppleTV, or the regular MacBooks?
Thanks!
BTW, I just called AppleCare and asked how much it would cost to upgrade the hard drive on my MacBook and they said $350 to $550 for a 250 GB drive! I also asked about voiding the warranty and they said the warranty is NOT voided if you upgrade your hard drive yourself. However, if you cause damage to your MacBook during the hard drive installation, that won't be covered under warranty. One option to consider that they mentioned is to buy a 500GB hard drive for ~$150 and have Apple install it, but I don't know how much the labor would cost. Doing it yourself is pretty straight forward though.
Can you do the same with a Macbook Pro? It seems the hard-drive might be harder to get out...
What a great idea. I swapped out my 80GB for a 320GB a couple weeks ago and now I am left with a loose 80GB drive. Now I need to buy a drive enclosure. Great idea to get all of the pieces in one purchase.
@Ednann: The largest 2.5" drives they make are currently 500GB, so for now 1TB isn't possible.
thanks. anonymous. does anyone know if the wd drives are 7200rpm and if they still work with the HD sensor built into the macbook pro.
What a wonderful post! I'm definitely going to try this out but I'm a little nervous -- it would be great if you could post a few more pictures or maybe go into more detail about some of the steps, like detaching the USB connector from the SATA power and data terminals on the harddrive and torqueing on the USB PCB. Sounds kinda hard but maybe it's not? Just don't know what all that means. Anyway, fantastic post, thank you! The 80GB hard drive on my laptop has been killing me!
Curious about how to replace the drive in a MacBook Pro? Google: "replace drive macbook pro"
You will find several guides.
It is nowhere near as easy to replace a MacBook Pro drive as it is to replace the drive in a MacBook. But the requirements are the same: 2.5" SATA drive. So any of the drives mentioned in this article SHOULD work.
Great Tip! I will definitely save this so I can mod my Macbook Pro...once I save 2,500 bones... =(
Great article. Do you know if there is a way to clone a windows partition when you clone the mac hd?
I did exactly this upgrade on my MBP last year. A note of caution: when you prepare your new hard drive, be sure to partition it as a GUID Partition Table drive, not as an Apple Partition Map drive. I failed to do this, and although everything seemed fine, when it came time to upgrade to Leopard I discovered that my shiny new Leopard disc would only install onto a GUID hard drive. I had to do a round of backup-swap-repartition-install-restore to get it installed. See this article for details of this issue.
Eric, thanks for pointing that out! You probably saved a lot of people a major headache down the road when they go to upgrade their OS. I'll update the article to include that step. Again, THANK YOU!
Bob, I'm not sure if SuperDuper will clone the windows partition, but you can try and see! After you clone the hard drive, restart your Mac and hold down the option key, which will let you boot from the external hard drive connected via USB. After it boots up from your external HD, you can see if it works. Sorry, that's all the help I can give you.
sj, I've added a picture gallery here: http://picasaweb.google.com/tim.molter/MacBookHardDriveUpgrade, which I'll soon add detailed comments to the pictures.
ednann, sorry I'm not sure, but I recall seeing other articles where people installed 7200rpm HDs in Mac laptops.
ruth, I'm not sure if this can be done to an iMac or AppleTV. For the question of wondering whether you can do this to any device, the key thing to find out is if those devices contain a 2.5" form factor SATA hard drive in them. They might have a IDE hard drive if they are old machines and then you would need an IDE replacement HD. What do you mean by "regular MacBook"? If you mean the "old" white or black ones that you could buy a year ago, then yes this upgrade will work. The MacBook I have and did the upgrade to is one of the "old" all-white MacBooks.
Don't forget to run a secure erase program on your old drive before you sell it on ebay or craigslist. Even if you delete the partition it's not hard for a technically savvy thief to recover it. It would be a real shame if some thief got your credit card number out of your browser cache. I like using Darik's Boot And Nuke, which is supposed to work on MacBooks as well as any Intel based PC. There are probably Mac based programs that would work as well.
You forgot to mention the part where you wipe your old hard drive, and prevent identity theft, picture theft, pour-no theft... ;-D
Hey Tim,
Fantastic Post, I think I will give it a try. Quick question, when you clone your drive to the external does it bring over everything? INcluding installed programs (photoshop, Final Cut), Settings, et all? I assume by clone it does but I just want to make sure before I go and mess with all my stuff.
Thanks for the insight!
The Disk Utility has an option to erase the HD securely.
is this 7200rpm or 5400rpm...this is important for me
erik, I don't know, but I would bet that it's 5400 rpm.
peter, yes, using SuperDuper! to clone your hard drive brings over everything including installed programs and settings. The neat thing though is that after you do the cloning and before you even begin to disassemble your MacBook, you can boot from the external hard drive by restarting your computer, holding the option key while it boots up, and selecting the external HD as the boot disk. If you are happy with booting from the cloned HD at this point (all your programs, data, and settings show up), continue and do the swap.
Yes, it's important to securely delete your old HD before you sell it! Once you have it reassembled in the external enclosure, plug it into your computer via USB and use Disk Utility to securely erase it. You can choose to have it erase it 30 times if you like. In fact go ahead and repartition it when you're done erasing it. Or like Mike said, there are other programs you can use to securely erase a HD. For me, using Disk Utility to securely erase and repartition is enough.
One last question.
Anything you recomend in terms of not shocking the mother board? I only ask because I used to work at an Apple Store and I saw a bunch of people come in trying to do a RAM install and they ended up generating static electricity and completely shcoking the system.
peter, good point! Static electricity discharging from your hand to an electrical component you are holding such as the raw hard drive circuitry can potentially fry the electronics. In years of handling circuitry, I never had a problem with it. Just make sure to avoid as much as possible touching the components on any circuit board and ground yourself first by touching the ground with your finger. I added a word of caution about ESD in the article. Thanks for mentioning that for people who weren't aware of it!
Hello Tim!
I have Parallels installed on my current hard drvie. Do you know of any issues that I need to be aware of if I use "SuperDuper" to image my current drive and transfer it to a larger one?
tempting...very tempting...
thanks i will think about it :)
Kenneth, I'm not aware of any issues with Parallels and SuperDuper!. My guess is that it would work out fine.
I've seen a similar article to this on TechBlog, but yours is also useful. I've got the MBP though.
hi, great tips followed it word for word and works great
THe only thing is...during boot up and at some other times, my macbook sounds significantly louder...there is a strange humming noise
DO you experience this after the swap you did?
i used the same hd (wd passport)
please let me know...and any suggestions? should i reinstall the hard drive to make sure everythings tight?
question, I'm glad it worked out for you! I did NOT notice any strange humming noises after I did the swap. The Western Digital hard drive that I installed into my MacBook is just as quiet as the one I took out. The humming must be vibration either from inside the HD or vibration between the HD and the MacBook internals. Did the Western Digital HD make any noises like that while it was in the external case that it came in? If it did, you probably got a bad HD. If the noises showed up only after you installed it in the MacBook, it's probably that it's somewhat loose. I would take it back out, make sure the 4 screws holding the metal shield are tight and there are no loose parts, and then put it back in. Make sure to push the HD in very firmly with your finger tip. Also make sure that L-shaped bracket with the three screws in properly installed and tight.
I'm planning to purchase the newer Macbook Pro's soon and this guide caught my eye. The Apple Store employee tells me that with the new Macbooks & Macbook Pros, the hard drive is even easier to swap out and replace! So, I look forward to anyone who will post up their results and experiences when they've just upgraded their newest MacBook\MBPro with a larger hard drive for less than the price of purchasing it as a hard drive upgrade.
Thanks,
TK
Would using simple gloves (like you use in labs and hospitals) be enough to prevent frying any electrical component of the computer's innards?
I took a 300GB Western Digital external USB drive and set up a single GUID partition, MAC Extended. Ran superduper to it. Then, while the external drive was still on the USB connection, I rebooted with the ALT option and chose the external device as the boot drive. Worked fine. Then I swapped out the original 120gb drive with the 300GB drive removed from the WD case. Booted fine, but only the first time.
Then it wouldn't boot at all. Got the Apple logo and nothing else.
I put the original drive back in and it worked, so that showed me that I didn't ruin anything inside the Macbook. With the original drive in place, i rehoooked the 300GB WD as an external USB. When Leopard sensed it, I got a message "the disk 300gb was not repairable by this computer. It is being made available to you with limited functionality. You must backup your data and reformat the disk as soon as possible"
When I do a GET INFO on the 300 external drive, the following is reported
kind=volume
format=mac os extended
capcity=297.7
availability=191/77
used=106.6 (which is correct)
Shared is NOT checked
Disk utility for the volume, using Verify reported
Mac OS extended (journaled)
Then in RED it showed
invalid sibling link
volume checked failed
error: file system verify or repair failed
First Aid Failed
I've reformatted the external 300gb twice, ran super duper twice, and got the same results
Any help would really be appreciated
Gabe, good question. The answer is that it depends. :) Here's a good article about electrostatic discharge: http://hubpages.com/hub/Electrostatic-Discharge ESD is unwanted electric current flowing from one location to another. Examples are lightning, getting a shock by a door knob or another person, or zapping your electronics with your finger. Even a few millivolts can cause enough current to fry a transistor somewhere (and there are millions of them in a computer) if it's not designed to handle it. In the case of electronics, you want to prevent undesired flow of current by making yourself be at the exact same voltage potential as the electronics, which is 0 Volts. Wearing hospital gloves won't do that for you. What they will do for you is decrease the chance that current will flow from you to the electronics because it acts as an electrical insulator. But different gloves have different insulating properties and you can build up different voltage potentials, which are factors in whether or not ESD will occur. The point of touching the ground with your finger, which I recommended in the article, is to ground your body (make your electrical potential 0 Volts). The earth is at 0 Volts for all practical purposes. "Ground" in electrical circuits always means 0 Volts. That way if you are at 0 Volts and the electronics are at 0 Volts, there is zero electrical potential between you and the object and it's impossible for any electric current to flow. In fact if you wore those gloves and touched ground it could prevent a proper grounding because it would insulate you from the earth and not discharge that potential. I think your best bet it to touch the ground or something "electrically connected" to it with an ungloved finger. If you really want to be safe, buy a wrist strap like the one in the above link and use it properly.
Joemz, sorry to hear that you're having issues. I did some googling about "invalid sibling link" and I have three ideas. 1) You unfortunately have a bad hard drive. Did you own the HD for a while or just get it for the swap? Has it worked fine for you as an external hard drive for just storing backup files? Have you tried reformatting it, and using it as just a regular backup drive, i.e. without cloning using SuperDuper? Can you show something is wrong with it outside of this example and then get it replaced through warranty? 2) How old is you MacBook and what kind of processor is in it - Intel or PowerPC? If it's an old PowerPC-based MacBook, I think you need to choose "Apple Partition Map" instead of GUID when partitioning it. 3) Do you have any non-standard partitioning on your internal MacBook HD like more than one partition? Do you have dual-boot setup or something along those lines? It seems like the "invalid sibling link" can happen with system file overlapping (whatever that means) and maybe that's happening because of the way your internal HD, which amy in turn confuse SuperDuper!.
One thing you might want to try is to use Disk Utility and do a secure erase of the entire external HD. (I'm not 100% sure you can do that with DU, but I would guess you could.) I know repartitioning is supposed to erase everything on the HD, but maybe doing a secure erase will get to the darkest corners of the HD. I was surprised how quick the partitioning went. It took only about one minute, which didn't seem right, but I'm no expert on partitioning with a Mac. If you figure it out, please write a comment with the solution in case others run into the same thing.
Tim
Thanks the quick feedback. Some of the quick answers are I have an intel 2.2 Macbook. The WD drive is pretty new, and I had been using it for time machine without problems
Prior to getting your response, I decided to try one more time. But before I did the clone, I did disk utility and repaired permissions on the original drive and it found a lot of problems.
Then I did the clone and booted from the external clone a few times. Knowing that I then put the clone into the macbook, and immediately did disk utility, and it found a load of disk permission problems again.
But, the good news is that it's booting up with the 300gb installed, and apparently no problems
So, my advice is that before cloning, make sure the source drive is clean and that you've run repair permissions. Or at least it worked for me.
THANKS
Invalid sibling links...I had that error two weeks ago and after much research I finally tried out a program called Diskwarrior and it worked like a charm fixing the thing. For some reason, the disk Utility feature in OSX just didn't cut it.
Forgot to say thanks for this article on replacing the hard drive! MUCH APPRECIATED!
What is the max capacity you can install, is it only 500GB?
Can you purchase a HD that isn't an external one, that may be possibly around 1TB? If so, what physical specs would be required to install in the macbook?
to Bob and others looking to clone a windows partition- WinClone is free and designed to do just that. I've used it for backup but plan to use it when I upgrade later this week. Great post/walkthrough!
Gabe, as far as I know, the largest 2.5 inch form factor HD is 500GB right now. To work in the MacBook like the one I have, a HD needs to have a SATA interface and be 2.5 inch form factor.
I love you right now. I did the 500gb passport update. Worked like a charm, though the disassembly was a little difficult.
anonymous, I'm glad it worked for you. Thanks for leaving a comment. :) I was worried at first with all the comments left by people having issues.
Great post. I did this last night. Took about one hour from popping out the WD hard drive to completion. The star screws on the original hard drive was the hardest part and the rate limiting step. Everything works great and I have plenty of room to partition this new HD to run windowns and for my pictures and mp3 library. Thanks for all the help!
First off, thanks for this guide, I can't wait to try it once I purchase a new HD on Black Friday.
Second, I jus want to make sure I've got the impt facts down-it must be a 2.5" Form factor hd right? Pretty much the only 2.5" made are external-otherwise if I can find an internal w/2.5" and my desired size it should be fine right?
The WD looks like the easiest to open so I think I'll go for that.
If you've ever open an oyster opening the WD will be very easy
Gabe, The important specs that the HD must have in order to fit into the MacBook is that it must be a 2.5 inch form factor and have SATA interface. Beware because some external HDs are made from 3.5 inch HDs. But any of the small external drives that fit into a short pocket are the 2.5 inch HDs. Any internal HD that you find that is 2.5" and SATA should work too. And I think at this point, 500GB is the biggest you'll find in the 2.5" form-factor.
I completed this upgrade last week, and your directions were awesome...everything works great.
I have one question though, my macbook harddrive seems to be running constantly now. Before the upgrade, i had the stock 80gig mac sata drive, and when lightly using a majority of the time my harddrive would be dead silent...granted the macbook got hot and then the fan would start, but now its just constantly spinning, and it never goes to that complete silent mode anymore.
Are you experiencing this? is it just because the WD passport HDs are different and are always running?
b, what is probably happening is that Spotlight is going through the new hard drive and indexing any files that you put on it, which can talk a long time and ties up the HD and CPU until it is done. What I usually do is prevent Spotlight from indexing most of my files such as my music or pictures. I really don't need to be searching for specific pics or music anyway with Spotlight so why have Spotlight index it. To prevent SL from indexing certain folders go to System Preferences, click on the Spotlight icon. Choose the "Privacy" tab. Click on the "+" sign and add the folders you don't want to be indexed. Otherwise, if you want everything indexed, just leave your computer on and let SL do its thing until everything is indexed. If you look in "Activity Monitor" you might see a process called "mdworker" being very active. That is the process doing all the indexing for SL.
This behavior shouldn't be because you now have a WD HD in there. I think after it's all indexed or you prevent SL from indexing certain folders, the computer will behave normally. Please let me know if you still have problems.
Thank you for the great post.
My MBP has a Travelstar drive with some sort of accelerometer or shock protection (not electrical).
Did you take this into account when you replaced your drive?
nuke, My MacBook had an 80GB Fujitsu HD, and I'm not sure if that particular HD had any special shock protection (I doubt it). When I bought the MacBook, I wasn't made aware of such a feature. Maybe the MacBook Pros have higher-end HDs in them. In that case you would want to consider paying more for a HD with special shock protection features. Thanks for bringing up that point!
Great post.
I Just exchange my 60Gb HD for à WD 320Gb.
Thanks from france !
excellent, excellent post that is much appreciated--as are the insightful comments. i've been looking into doing this for awhile but was thinking about buying a replacement hd and a separate enclosure for the one that's currently in my macbook. i was wondering what you see as the advantage of buying an external hd set up rather than a hd and enclosure separately. the problem i've been having (which might have led you to get the wd passport) is finding an enclosure that can handle a 2.5" 500gb drive. that said, i like your plan but wonder how well the old drive would work once put into external hard drive case. has anyone had any snags with this end of it? does the passport enclosure function just as any other enclosure would, or are there other things to worry about since it was constructed as an external hard drive? i'd appreciate your thoughts.
Nice tip, but I had a problem with the THICKNESS of the drive I tried to use - a 500 G Hitachi from a SimpleTech external drive. I tried to force it into the thin space taken up by the original 80G hard drive, but no luck. Any comments or suggestion about how to get a thicker drive to fit, or the maximum thickness that will fit into an 80G hard drive's space?
zero, the advantage of just buying an external hard drive an repackaging the old HD into the case is that you only have to purchase one thing. This reduces packaging waste and the carbon footprint of shipping less items. Plus I like the design of the WD Passport enclosure. To me it's an elegant design and easy enough to take apart. The WD Passport case and the USB to SATA electronics worked perfectly for me with no snags. It functions just fine as an external HD with the old macBook HD inside of it.
polwee, bummer for you. I wonder why Hitachi made a non-standard size HD. I guess that HD isn't going to work for you. How thick is the HD that you took out of the MacBook? How thick is the Hitachi HD?
thanks tim. looks like i'll be ordering a passport myself. you have great info here.
It works! I used a Macally external enclosure instead, but everything seems fine after the operation. I think the larger disk is faster even. Perhaps because it's not fragged.
I used one of the small straight edge screwdrivers on the star of david screws on the internal bracket.
I'm super impressed. Thank you for posting this!
Help, did everything as instructed, but the although the cloned disk boots ok, any application you try to run crash "unexpectedly". Any ideas
zero and Christopher Johnson, I'm glad it worked for you. Thanks for letting me know your success!
anonymous, sorry I don't know what to tell you about that. I haven't experienced it or heard from anyone else. Maybe someone else can leave a comment with some ideas?!?!
because of this great advice i'm on the way of exchanging my whole hdd setup, wich involves too many small drives at the moment. will get three 500gb disks for 1. usage in mbp 2. external time machine fw-backup 3. long time backup/storage.
for the price tag of all this i'm in need to get the cheaper drives (wd), rather than the more expensive fw external cases (seagate fw). i've got one nice 2,"5 fw enclosure from omega already, does anyone have an idea if it's possible to put that 500gb drive used in this article (usb) drive into a fw case? i mean, if everything is connected via the sata-bridge, this shoule be no prob? because this would save me 100€, and still leave a happy person to take over ownership of my present drives, but with usb then.
also, as i'm a mbp user, i found the post about the sudden motion sensor interesting. on wikipedia (http://en.wikipedia.org/wiki/Sudden_Motion_Sensor) it is mentioned that replacing the drive can cause problems, even though the disk has SMS. good thing seems to be it can be turned off without loss in performance.
I'm pretty sure that the drive I pulled out of my macbook needs a separate power source besides the USB power from the WD Passport hook up. The blue light from the Passport goes on then off when I plug it in. I have no reason to think the drive is fried, I just think it's not getting proper power... Any advice of how to deal with this 80GB drive I have? I also have an extra USB 2.0 drive enclosure as well now.
Great post and great upgrade. I just finished this with the macbook I'm using now, and I can't say enough about how nice it is to not worry about that diminishing "available" count any more.
Many thanks!
I have done the upgrade to a 500Gb Western Digital Passport Essential Drive (WD5000BEVT) for USD163. I notice that the startup is way slower than with the Fujitsu drive that came with the machine and even in Leopard it seems much slower even though everything works fine.
The WD5000BEVT drive is SATA2. The only thing I can think is that there is a jumper on the disk, but I have googled the world and cannot find an instructions on the jumper settings or what they mean.
Anyone have any ideas?
Thanks again. Great Post
Andy Roney (new Macbook convert)
Thanks a lot Tim. I had purchased Logic Pro and was a little amazed at the 40 some gigs worth of space the entire program was going to use up. I know that I didn't need to load on all the bonus stuff, but I did pay for it. Needless to say, a bigger hard drive was needed.
I followed your instructions and installed a 320g seagate HD. It's working great, and now I can use the old drive as a larger Time Machine backup. Having never done this before, I was surprised at how easy it was. Once again, great post.
I too tried a 500 gb simpletech hd and found out it was too thick for my MacBook Pro. I even tried folding the wires the opposite but I didn't want to take off the grommets from the hard drive since it helps absorb shock and it would be a little loose. Also since a 500 gb hd is thicker it would be too tight inside and the weight of my palms or resting too much on the palm rests would make the hd scratch itself. So I returned the simpletech for a FireWire capable 320 gb iomega which was 20 cheaper and I can reuse the old hd for backing up music and other documents. I still got two USB ports for everything else.
Also I didn't need any additional software either all I used was the DVDs that came with the notebook. Since I had the original hd in the enclosure I plugged it to the mac when it prompted me to hook it up to the older mac via FireWire (usb works also) and it assumed it was an actual notebook. It migrated all music movies pictures and documents. It didn't migrate applications I installed myself though and I had to reupdate all existing apps like iTunes and QuickTime since it wouldn't open my library.
worked just fine putting the 500GB WD in the iomega firewire-case. thanks for this guide,
I recently came across your blog and have been reading along. I thought I would leave my first comment. I don't know what to say except that I have enjoyed reading. Nice blog. I will keep visiting this blog very often.
Kaylee
http://www.thinkpadonline.infojubfe
Magmora, On my WD external HD the light that goes on is white, not blue, not that that really matters. The light built into the external harddrive is part of the SATA to USB converter that plus into the hard drive. Perhaps it got damaged during the upgrade process? You could sell the raw drive as well. Someone looking for a burnt out HD for their Mac will buy it.
ashby, trev, anonymous, Carl-Oskar Linné, Awesome! Glad it worked for you. Thanks for sharing your success story.
Andy Roney, yeah, I noticed those jumpers too and wondered what they were for, but I have no idea. I just left it the way it came. In my case, I didn't notice any slowdown with Leopard or during startup. Maybe it will fix itself.?.
Cristina, Thanks for letting me know. I'll try to post some additional interesting stuff. Feel free to follow this blog by adding your self to the "Followers" list found in the right-hand column ---->
Awesome guide! I'm thinking about doing such a swap, but I have a question about the partition part. I have an Intel based MacBook that has Leopard on it (purchased 3 months ago). Do I still need to partition the external HD (which will become my laptop HD)?
Hello all! Good stuff! I can't wait to do this to my Macbook. One question...will I run into any problems trying to partition the drive multiple times? I plan on uploading windows after I get the new HD installed, and I know that that requires partitioning...
Much thanks and keep up the awesome work! Cheers!
YOU don't need to partition the HD to run Boot Camp. When you start up the Boot Camp utility program, it will ask you what size you want the XP partition to be, and it'll do it for you
Dan, Yes, you need to partition the external HD as outlined in Step 2. From what I remember, it only takes a couple minutes. My MacBook is an Intel-based laptop running Leopard.
Hey Tim,
great post, thank you very much!
I guess WD wil have a good quarter now.
As this is so easy I recommend everybody to do it. But get the strange screwdriver in advance... I was "forced" (want to get it done, right) to use other tools too, but it worked!
Thanks again and good luck
Hi, Tim.
Just finished the "procedure" on first generation black MacBook (2Ghz Intel Core Duo). However, instead of 500GB hard drive, I opted for 320 GB 7200 RPM Western Digital drive (Model# WD3200BEKT). Worked like a charm.
Thank you very much for the very detailed description.
K
Hello Tim-
Wondering why you choose the WD Passport (other then one-stop-shop solution). Are there other technical strengths that this product has? Speed transfer rate? Shock resistance (like WD Scorpio line)? Noise reduction?
Curious,
Waleed
This is beautiful. Worked like a charm.
Popped a 500gb Seagate into the two year old MacBook and am using the old 80gb drive in an external enclosure for backing up photos and documents when I travel.
Thanks for posting this.
I had read this blog about a week ago went to costco tonight saw the passport elite 500gb for $149 and thought what the heck i might as well upgrade (its Christmas) I had to file down a screw driver in order to get the plate off (I didn't have one small enough lying around) once i took out the battery but other than that it was a pretty straight forward processes. It maybe took an hour as I leisurely worked/ watched tv. I am not a computer guy but with these directions it was easy. Now I just need to upgrade the RAM
Thanks for your help
Waleed, no special reason besides I liked the price, and it looked like a nicely-designed product from the outside. I've used WD internal drives before for computers that I've built and never had a problem. I really wasn't too concerned with transfer rate or shock resistance.
Thomas and Anonymous, Thanks so much for leaving a comment and letting me know that it worked out for you!
Please add me to the list of happy readers who followed your advice and updated my hard drive. I bought the BlacX base ($37) and a new 350 gig hard drive for the project. It was as easy as you said it would be. It seems to be working fine. Fingers crossed. Thank you for publishing this very helpful article.
Hey Tim, very nice guide here. I was about to order one of the 500gb passport off of Newegg, but I found this.
http://www.newegg.com/Product/Product.aspx?Item=N82E16822154292
It is a lot cheaper than the one from WD, but will it work? It is 2.5, so. If not, then I can just safely purchase one of the WD. Thanks :D
WA4ILO, Glad it worked for you!
Nagel, In theory it should work, it's the right size. I personally wouldn't buy that one though because it's a lesser-known brand and there is only one user comment left for the HD on Newegg. There might be a reason it's only $100. I could be a piece of crap. But then again, it could be just as good or better than the WD - who knows. I would spend the extra $50 for the WD as "insurance" knowing that many other people have successfully completed the upgrade with it and that it's a quality HD. If you decide to go with the Lacie, please leave a comment whether it worked or not. Thanks!
This is a great post. A couple comments:
1. after looking around for suitable drives, I was only able to find 5400RPM drives, so if your macbook has a 7200RPM drive, you'll be taking a 33% access-speed hit. Instead, I opted to leave in my 200GB high-performance 7200RPM drive and tether the WD 500GB drive for mass storage.
2. ESD. This seems to be an often overlooked and underestimated problem. After making big investment in Mac hardware, it would be a pity to start having latent, random problems due to ESD. The only way to guarantee you're not incurring ESD damage is to use an ESD mat and wrist strap. I looked on amazon and both these items are available for a total of about $30. For example,
http://www.amazon.com/StarTech-M3013-24x26-Desktop-Anti-Static/dp/B00009XT3H/ref=pd_bbs_sr_1?ie=UTF8&s=electronics&qid=1230502195&sr=8-1
Let's hope for a 1TB 7200RPM drive soon!
easy peasy. worked like a charm. i love u forever. i was gona do a vid on the project buy my mom took the camera midway. boo her. anyway everythings great. instructions were easy. hardest part was the wd case. thanks so much. the only thing though, my old 120 gb apple hd in the external case doesnt seem to getting recognized now (mac or pc). i connect it, it spins for a few seconds then nothing. the light blinks then it just stays on but it doesnt show up in the comp. any thoughts?
I am about to put the WD Passport 320GB in my mac, but i noticed that the new HD clicks if I barely move it around...a little worrisome. Should I try to exchange this drive before cracking it open and putting it in? How can I totally clear it off so nobody can get my personal stuff?
Thanks! I cant wait to get get my new HD up and working!
Anonymous, Glad you liked the post. Thanks for your comments. I don't even know the RPM of the HD that I took out of the MacBook, but yeah, that might be a concern for some people. I didn't notice any decrease in speed, but I haven't run any tests either, nor do I intend to. It would be wise to take proper precautions for ESD, and $30 is cheap insurance. :)
christopher from NJ, too bad your mom took away the camera, would have liked to see a video... I don't know what to tell you about the HD not being recognized. Try opening up DiskUtility and see if the HD shows up there.
Anonymous, If the WD external HD clicks when you move it, perhaps there is some loose debris in the plastic case. You can open up the case and check it out. But if the clicking is from inside the actual hard drive, I would exchange it if possible. I think you can totally erase all the data on the HD using DiskUtility. Perhaps you can use the secure erase feature. Try Googling for some instructions to completely delete data on a HD.
thanks a lot...i just did it...followed it step by step...the pictures were very useful...now i got 500gb macbook.
Hey Tim, I too have a 80 GB white MacBook, and am really wanting to upgrade my harddrive since iWork '09 and iLife '09 came out yesterday and I have no space for them!!
One question, what's the benefit of using SuperDuper to back up? Can we just use Time Machine to do a complete system restore? A friend of mine told me that he's only just used Time Machine to restore after he's put a new drive in.
Great post, I'll carefully follow each step (I never done any hardware stuff like this before, so a bit timid!), once I managed to get myself a WD passport essential 500 GB!
Jack Hoyd-Gigg Ng, I'm not 100% sure if there is an advantage to using SuperDuper over Time Machine. I'm not familiar with using TimeMachine, so I don't know for sure if it can or can't do a clone like SuperDuper can. Please leave a comment if you get it to work using TimeMachine. Thanks and good luck!!
In the words of Borat...GREAT SUCCESS!!! While watching the Florida Gators beat OU ASS I swapped my 150GB Mac internal HD for the Seagate 500GB...Feels great havin extra space - im bout to load windows - and Im using my old harddrive in the seagate case for travel/backup. The only concern I have is that the glue that I pried apart will not hold...I may pop it back open and Gorilla Glue that junt! Thanks to all yall and good luck to those about to do the "procedure."
PS. I wrote earlier about the WD passport making clicking noises. I returned it to Wallyworld today telling them that a "fatal error was imminent." No questions were asked, and since I shredded the box I highly doubt they will put it back on the shelves...which lead me to believe that one could easily swap harddrives and just return the "defective product," Getting the new 500GB internal drive for much less than $100 (about a hundred less...) Not saying I am suggesting that anyone do this - that would be immoral...but many consider Wallyworld to be the source of evil anyway, sooooo...Use your best judgment...?
Thanks again Ladies and Gents!
These instructions are right on, not a hitch. I followed all the instructions to a tee and it worked without flaw. Picked up a 500 GB Passport Elite and sub'ed out my old 120GB standard HD.
Much appreciative and would suggest to anyone who wants more storage on your mac.
This is as easy as it gets!
Tim, you da man! I swapped out my ancient 60GB for the 500GB WD passport. I ran a humidifier to help eliminate the static (January in the Midwest + carpeted floors = extreme static). Thanks again for the fantastic instructions.
I just upgraded my drive from a 120gb hard drive to a 320gb WD Passport Drive. I had no idea it was this easy. It took me no time at all. I ran the clone at night, the next day I cracked open my passport and made the swap. The only trouble that I had was with super duper, it keep locking up. I used a program called carbon copy cloner it is also freeware. It worked great.
Thanks,
Great tutorial. Especially the part about partitioning. I read another online tutorial that just skipped that bit. Good to know.
Upgraded my old 80GB Macbook drive to a nice new Seagate 320GB 7200 RPM. New disk was $89 and <$10 for an enclosure.
No problems and lots of free space.
Hi, it's Gabe once again.
I'm getting ready to go through but I've a few questions.
Why is the GUID partition necessary-is it if I've got a Macbook with Leopard?
Also, how do you ground yourself? I have a wrist strap for this but what qualifies as a ground? I noticed you weren't wearing a wrist strap.
Thanks!
I used your article to help me clone my laptop 80GB HDD that is running Vista to the WD 320GB drive! Since I am running Windows, I found the trial version of Acronis True Image Home was all I need to make a bootable copy. It was waaaay simple and now I got a ton of space.
Thanks for the great tutorial!
Anonymous(es), Danny, JD, Glad the instructions were helpful to you! Thanks for letting me know. :)
Gabe, you need to have the drive partitioned GUID if you ever want to upgrade the OS in the future for an Intel-based Mac. I don't know technially the reason behind that, but according to other people who know about those things it's true. Good that you have a wrist strap to protect against ESD. "Ground" is the electriaclly neutral earth and everything electrically attached to it. So the earth is connected to your basement is connected to your floor is connected to your desk is connected to your wrist strap is connected to you and your fingers. The wrist strap prevents your body from building up electrical charges like when you walk on a carpet for example. Usually attaching it to a heavy piece of furniture is all it takes. Try Googling ESD electrostatic discharge for more info.
Doesn't the my passport drive have a 2MB cache? wouldn't that be inadequate?
great article. I do have one question, is a SATA300 drive compatible with the MacBook/Pro? Those can be found fairly cheap ~$100 or so.
Anonymous, How much cache does the stock HD in the white MacBook have as a comparison? I have experienced no conceivable difference in HDs except for the 500GB one has a lot more space.
Zack, sorry, I'm not sure, but the WD 500GB is down to $115 on Amazon.
Tim I think the MacBook had a 8MB cache. My MacBook Pro has 8MB so I would want to find the same. Maybe that has to do with the external enclosure?
Also so from everything I can find, the SATA300 should be backwards compatible with jumpers being the only mod necessary and only on some drives at that.
Thanks again, I've got to do this soon. Much cheaper than upgrading the entire machine.
Thanks so much.. just did this running Tiger with absolutely no issues.
The bigger internal HD will be a huge help for doing my audio work on the go... cheers
Success! Thanks so much for inspiring me to make this upgrade. I opted to get the separate components and spent $117.68 from Amazon for the 500GB drive and USB enclosure shipped. Now, I have another backup disk at 160GB and about 375 GB free on the new disk.
Chris and Zack, Glad it worked for you. Thanks for leaving a note!
Thank you so much for this article Tim. I just bought my first MacBook yesterday (long time windows user) and your tutorial save me from spending on the harddrive upgrade directly from apple.
My question: does the USB drive used have to be mac formatted? Or can you use a windows formated drive and then reformat for mac using the disk utility in leapord?
Thank you again for your time on this.
Anonymous, I believe you can use any drive with any formatting b/c it will reformatted. When I first got my MacBook one of my first delights was discovering that I could plug in my USB thumb drives or HDs into both Macs and PCs and there were no formatting problems. I had the idea from back in the old days that Macs and PCs were incompatible, but I think that drastically changed when Apple started using Intel CPUs.
Thank you Tim for the excellent post. What a creative and resourceful guide you've put together!
I purchased the "Western Digital My Passport Essential 500 GB USB 2.0 Portable Hard Drive, WDME5000TN" at Amazon and was able to easily follow your directions. It's working awesome!!
For Anonymous: the drive in the WDME5000TN I got was a WD500BEVT-11ZAT0, "WD Scorpio Blue". It has an 8MB cache, same as the original 120 GB Toshiba MK1234GSX I replaced.
I followed this to the letter and now have a 500Gb upgrade and an 80Gb spare HDD. Many thanks for putting it together - I wouldn't have thought of upgrading in this manner, but it worked a charm. Thanks again.
Tim, thanks for the helpful info/tutorial. I just installed a 500GB Seagate and I couldn't be any happier. I followed the instructions and had no problems. Now...on to play with all my free hard drive space!
HELP!...
Blogger Billful said...
"I purchased the "Western Digital My Passport Essential 500 GB USB 2.0 Portable Hard Drive, WDME5000TN" at Amazon and was able to easily follow your directions. It's working awesome!!"
I got the same one as Billful, and for some reason when I opened it, I was not able to separate the usb connector from the main plate as it seems it is all on one plate. I am a novice at this, and thought I could do this on my own, but now may need to get some professional help. any tips on what I should have bought or do?
Billful, NJ and Anon, glad it worked for you! Thanks for leaving a comment.
Blischka, if you got the exact same model as Billful, and he was able to separate the USB to SATA connection, I would think that it would also be possible for you. If it is truly connected like you think, then you're out of luck. I would bet though that if you try again, you can do it. Separating the HD from the USB to SATA connector is tricky, but with enough patience you will get them apart. Did you see the extra illustrations and instructions I put here:
http://picasaweb.google.com/tim.molter/MacBookHardDriveUpgrade#
? Try again and write me an email if you still can't do it. ;)
Hi Tim! thanks for writing back, but I think I can't separate. I took a photo for you to see: http://picasaweb.google.com/lh/photo/IrVG6l9COAQO_zIoCZYMIg?authkey=IYhg6QVASKc&feat=directlink
how would i know that the one i purchased can be separated?
Blischka, The link you posted doesn't lead to a picture. Perhaps you haven't set your Picasa album to be public?? I'd really like to see the picture...
Hi Tim,
made the folder public. sorry about that. I looked at the top of this blog and the HD i got looks just like that...not sure how to take it apart like the photo scrolling through the blog.
Blischka, Indeed, it looks like they must have changed the design! Does it say Western Digital with the model number anywhere on the other side of the HD? If you could take a picture of that, I'll post a warning on this article. Maybe you could add a few more pics to your Picasa gallery and I can link to the photos? That way I can alert any others who would like to do this upgrade. Your help is appreciated. Sadly, the HD you have isn't going to work. :(
okay. i'll take a few more photos. it is discouraging. I really thought I would be able to do this on my own. is there a way to find out if the HD has a removable USB? I don't mind emailing you the photos so you can use them at your own discretion. I am going to take down the photo from my picasa website...
where should I email them?
Blischka, I don't know of any way to find out if the HD has a removable USB besides opening it up and looking. Thanks a lot for bringing this to my attention. I really appreciate it. Please send me a few pics so I can alert other people to tim.molter@gmail.com. Much appreciated. Sorry it didn't work out for you.
Hello,
Same here:
I finally got decided and bought the WD "passport essential" 500GB on amazon (UK) for £100.
Indeed, the drive was built in January 2009, and the circuit board is in 1 piece.
Any tip would be welcome, like places to exchange the drive, ways to have it refund,...
Tim, please put a warning on the top of the page: people should be aware of that.
Cheers
Martin
Martin, Thanks for leaving a comment regarding the one-piece circuit board. Now that you confirmed this, I'll put a warning right away on top of the article so that other people avoid getting stuck in the same situation as you and Blischka. I'm sorry that this happened to you. :(
Even though the Passports are not compatible any more this upgrade is still easy and very affordable.
I opted to get a drive and enclosure separately rather than the passport and spent $107.68. The quality of the enclosure may not be as good as the Passport enclosure but it's still really small and nice enough.
I still recommend and encourage this upgrade and just told someone else about it today.
Now when are the 1Tb drives coming?
Thanks for the information about upgrading the drive on one of the white MacBooks. I'm getting ready to tackle this project.
Last fall I upgraded the drive on my unibody MacBook and I have a slightly different approach to share.
I purchased two 500GB Samsung Spinpoint drives -- one for the Mac and one to serve as a backup drive. I notice that NewEgg currently is selling them for $94.99 with free shipping (http://tinyurl.com/auxhlk).
Then I purchased a tiny USB+eSATA bus-powered drive enclosure on eBay from Oyen Digital (http://stores.ebay.com/OYEN-DIGITAL) for $27.98. (You can see a comparable drive here: http://tinyurl.com/dasf6q)I was very satisfied with Oyen Digital's communication, service, and pricing. At the time, it was a bit of a challenge to find a drive enclosure that would work with a 500GB drive. Because an enclosure is designed to be opened, it's much easier to work with.
I cloned the 250GB drive that was in the MacBook onto one of the 500GB drives I'd installed in the enclosure. Then I popped it out and installed it in the MacBook. Finally, I cloned the drive I'd just installed onto the second drive, which I'd installed in the enclosure.
Yes, this approach is pricier. However, if not having any downtime is important to you, you can deal with a drive failure in minutes. You also have a easy backup solution because the drive in the enclosure is the same size as the one in your MacBook.
Tim, Thank you for putting up this detailed install for upgrading a MacBook. I did that this past weekend and everything seems to be going fine... I got ahold of a 500GB Western Digital hard drive and was hoping that it wasn't the newer version that is the one-piece circuit board. The one I purchased was in a cardboard square box and turned out to be the two-piece circuit board type. They had some other Western Digital hard drives that came in clear plastic and these might be the one-piece circuit boards. I didn't buy any that came in the clear plastic, but it seems to make sense that this is a newer packaging.
Oh, The reason that I purchased the new drive was that I had a 80 HD that failed and wanted to upgrade anyway. I had all my data backed up on a 250 GB Maxtor Ext HD via Time Machine and was able to restore that data onto the newly installed 500GB Western Digital hard drive. I just booted up into my Leopard DVD install disc and selected “Restore System from Time Machine” in the Leopard DVD Utilities menu. Took about 1:30 to upload 48 GB's. Restarted and everything was there. :) Thanks again...
D
I am in the UK and bought a 500Gb Passport Essential, to find it has the one piece circuit board now discovered by some. The build date was 7th Feb 2009, it was in a green boz with plastic display for the drive.
It was pretty tough to prise out as well, it would not slide out like your one. Fortunately I have managed to get it back in the case and it seems to be working so all is not lost. I guess I will get a WD Scorpio drive and an external case.
Can you backup your data on the internal the same was as with the external?
Zack, Anonymous, thanks for the information, much appreciated.
D, Thanks for sharing your story. The original WD Passport that I bought came in a clear plastic package, not a cardboard one like you described. So I don't think we can say that Passports in a plastic case are the new one-piece designs. It looks as though the newer Passports bought in the UK are the one-piece design. Has anyone in the US seen these?
Jaunty, Thanks for the valuable information. Too bad they went to the one piece design. At least you can use the drive as a mirror backup.
Nolan, yes you can, but only if you have a way to connect it to a USB port. For that you need the SATA to USB connector found in certain external HD enclosures such as this one here
is it possible to use something else than WD?
I was looking at a 320Gb seagate external hdd and since the other hdd were the new WDs, i thought of buying this one...
The thing that bothers me is if it will fit in the macbook because some hdd are thicker than others so if anyone can enlighten me, i would appreciate it!
Is it possible to use something else than a WD external HD?
i was looking at a seagate 320Gb today and it seemed interesting!
If i upgrade the hard drive, will the sudden motion sensor still work?
blackjak231, I'm not sure if the Seagate HDs will work, but the chances are pretty high I would guess. If you try it out, please let me know how it worked!
Keanu, I don't know, sorry. Probably not. What model Mac do you have with sudden motion detection?
Hello, and thank you for this post! It has inspired me to do an upgrade rather than get a new MacBook at this time. Not sure if there are better options, but you can check out macsales.com and get several options for the HDs that are compatible with whatever MacBook you might have. I just ordered a WD 500gb (8mb cache, 5400rpm) and a single 4gb ram card for my black MacBook (can handle 6gb of ram, 2x4).
Thanks again!
Just completed. Awesome tutorial!
Thanks for the great tutorial. Just picked up a Western Digital at Best Buy (onsale $120 for 500gb, U.S.A). Thankfully it was not a one-piece. Here is the info from the box (which was cardboard not plastic), in case someone else is looking to buy. No guarantees but it worth a shot to compare and match.
western digital my passport essential (black)
SKU# 718037735092
order# wdme5000tn
model# wd5000me-01
r/n: b7b
green cardboard box
awesome post. i'm looking to upgrade to a 500GB / 7200rpm drive, has anyone done this yet? i've only seen 500GB/5400rpm upgrades on here and need a 7200rpm drive. i know seagate makes an internal 2.5" 500GB/7200rpm drive for $130-150 that i found on that macsales.com site, but you'd have to find a way to copy your current drive onto the new one.
I just changed my 120 GB for a 7200 RPM 320 GB, followed the instructions to the t, one thing though now it takes close to a minute bootin up mostly on a white screen i never seen before with the old drive.
Oh My God!!. Nothing works. I cant even get my computer to turn on. Sad mac. I lost everything. It had my wedding pictures and all my financial data.
anonymous, Thanks for the tip for checking out Macsales.com for compatible HDs. I'm glad the upgrade went well for you!
Nathan, thanks for leaving that information - hopefully it will help others to find the Two-piece WD external HDs...
anonymous, The cloning of the 7200rpm HD should follow the same method as for the 5400 rpm HDs. Just use SuperDuper! with the 7200 rpm connected to the USB port with an external enclosure kit and copy the internal HD.
Ricardo, I haven't heard of this problem yet from anybody. Does it still happen a few days later? Did you try putting the original HD back in?
Todd, Sorry to hear that you lost your data. Rule #1: Backup your data. :) If you leave some more detailed information on what exactly the problem is and what events let to "nothing works", I'd be happy to try to help...
Todd, you gotta get back to us. Surely you can salvage some of your data. Some smart people on here could try and help you.
Hey Tim, anon w/ the 500gb/7200rpm hard drive question. Just bought a Seagate 500gb/7200rpm Drive, StarTech external case, used Super Duper to clone my drive wouldn't reboot off external so I run Disk Utility, repaired permissions and now it works perfect. Already installed it and typing this right now w/ my new drive installed. Last time I bought a drive (few months ago), the local computer shop charged me $110 to dupe my drive and didn't even wipe my old drive clean. I totally recommend this upgrade for everyone. Thanks again.
Hi, thanks for the post, everything went smoothly until I tired to plug the external back in. The external does not seem to mount onto the desktop and it does not show up in the disk utilities. I've tried restarting holding the option key and the hard drive does not show up as an option. I thought it was the hard drive, but it does with with my ipod also. The ipod does not show up on the desktop or disk utilities, but it does show up in itunes. Same with a flash drive.... does not show up on the desktop or disk utilities.
Any ideas?
anonymous, Thanks for the tip and you're welcome!
anonymous, I thought about your problem for a while, but I can't thing of anything to suggest. It's strange that you aren't seeing the external as a bootable device after you start up with the option key held down. If you are confident that the cloning went well, you could just go ahead and replace the internal HD with the newly cloned external HD and see if your MacBook boots up from it. If not, just put your original HD back in and continue troubleshooting. Sorry I couldn't help more than that!
Sorry, maybe I wasn't clear enough with the above comment on not being able to see/mount external drives.
I completed all your steps... the cloning went flawlessly, booting up from the external to check if everything was imprinted went trouble-free and so did the installs.
The above problem occurred after all this when I tried plugging in the (swapped) external hard drive back in to clear out the old data from my (old) drive.
Read on a mac forum that suggested resetting everything. Guess there are some keys that you press at the startup and it will take you to some menu where you reset everything. Will try that and get back.
I swapped out my HD for a seagate 500 probably back in december or early january...every thing seems to work fine, but for the last couple of months my computer has made a regular clicking noise about 90% of the time - or maybe it's 100% and I just ignore it sometimes. It's very quiet and not noticeable if there is any sound in the room, but when using the computer in a quiet room it is very annoying.
Should I be worried about this? what can be done aside from get another HD? Everything seems to work fine. I have been backing everything up as I know that clicking is supposed to mean "imminent failure." I hope I am not speaking too soon, but it has not crashed yet. (GOD PLEASE DONT CRASH!)
I just posted about my harddrive clicking...on second thought, I think it only does it when I open Firefox...is that weird? would it clear up if I just reload firefox?
anonymous, ahh, I see what you meant now. That's weird that it doesn't show up at all in Finder or in DiskUtility. I honestly don't know what to tell you, but you'll probably find something out from your search...
Ben, Yeah, that's weird that it only happens when using Firefox. That makes no sense whatsoever. :) Usually clicking noises are bad. Perhaps you got unlucky and got a lemon HD. I think someone else posted a similar case and they returned the HD for a new one. The only noise I ever noticed from my 500GB HD is a very quiet hush, like a gentle breeze flowing through the pines on a warm autumn day.
You can determine (with some accuracy) if the 500GB Passport you purchased has the integrated USB controller, or is the more traditional HD + separate controller by looking at the part number (or maybe serial number).
If it's A7B or B7B, it's a BEV or BEVT (normal) drive.
If it's B8B it's the BMV drive with the integrated USB controller (bad!).
It may not be 100% reliable, so be sure to plug the drive in to a computer and run System Profiler to determine which exact model (BEV/BEVT - good, or BMV - bad) you have inside the enclosure before you void the warranty and crack it open.
Great man! It works completely fine! now I'm running a huge macbook :D
Thanks
Best regards
Hi guys I am having trouble doing this mod. I have a macbook with a 80G harddrive and a 250G drive i wan to swap in. but once i switch them up i get absolutely nothing, its like the drive isnt installed at all. any help would be appreciated. you can reach me at dfj@sfuca
my comps hardrive info is below:
Hardware Overview:
Model Name: MacBook
Model Identifier: MacBook2,1
Processor Name: Intel Core 2 Duo
Processor Speed: 2 GHz
Number Of Processors: 1
Total Number Of Cores: 2
L2 Cache: 4 MB
Memory: 1 GB
Bus Speed: 667 MHz
Boot ROM Version: MB21.00A5.B07
SMC Version (system): 1.13f3
Serial Number (system): 4H648H91WGL
Sudden Motion Sensor:
State: Enabled
Hello all, Is it possible to use the maxtor one touch 4 plus in lieu of the western digital harddrive to replace the white macbook's internal hd?
Thanks for your replies.
So I'm thinking about trying this with a 1.5 TB drive. Sound like a good idea? Not that I'll ever need that much space on my mac (who knows? Maybe I will) But I figure go for the best out there on the market right now.
Is it possible to even do this? Can I just buy an internal drive and not worry about the external drive part of it?
1) Just thought I'd ask. And 2) Just thought I'd throw out an updated suggestion for other users.
-J.D.
CkunkClunk, Thanks!!!
Anonymous, were you able to boot from the external HD with the cloned system on it connected via USB ?
wilsonhiroband, I don't know specifically for that HD. If it has a SATA connection, is a 2.5 inch form factor HD, and has a height of about 9.5 mm then it will most likely work.
J.D., I don't see why it wouldn't work except if for some reason a MacBook has a built-in GB limitation in the HD controller part of the motherboard of some sort. I wish I knew for sure. If you don't buy an external case with a SATA 2 USB connector how will you do the cloning? You won't need it of course if you just use the OS install disks to install a brand new system, but if you want a clone of the existing system you'll need the SATA to USB connector.
Man! Great post Tim. I just read this today. I am a green apple when it comes to this. I've been waiting for this tip since I got my MB last year. Yes, the 80GB is very limiting and kind frustrating. I will definitely do this this coming weekend and follow it to the T. I just hope when I buy the WD 500GB it won't be the "one-piece" HD. Tim, just looking at the box, is there a way to be sure that what I am buying is the "two-piece HD"? Please help. - T2RCO
Anonymous, I'm not sure how to tell just by looking at the box, but see ClunkClunk's comment about the model numbers a few comments above...
Western Digital WD5000BEVT Scorpio Blue 500GB + Icy Box IB-290STUS-B = SWEET! Thanks for the instructions!
Hello.
If anyone who has done this hdd-upgrade and still have the usb-circuitry from the box left and have no use for it, I would like to buy it.
I just need one, and I can pay through Paypal.
I'm located in sweden and you can contact me on
Trepp [at] telia.com
/Koplimi
Could you get a macbook hard drive with leopard pee-installed?
http://w.slickdeals.net/forums/showthread.php?t=1467621
Dell has this harddrive for $80 and $72 after coupon!
Just did it with a Seagate 500GB Drive (16MB Cache, 7200 RPM) and a generic external case (USB & FW)
I didn't buy an external drive since the "empty" kind is simpler to repeatedly open and reassemble.
Thanks for the detailed post and followup!
the hard drive on my macbook recently failed and so I replaced it with a 500gb western digital scorpio which I bought at Fry's for $110 after tax. Now, I was in the unfortunate circumstance of not being in the habit of using time machine to back up my old hard drive, so I essentially took out the failed drive and installed the new on in its place. I'm under the impression though that had I used time machine, all I would have had to do after re-installing OSX on the new hard drive is restore the most recent time machine backup of my old drive to the new one. Wouldn't this bypass all the business of scrubbing the old drive, re-casing it and then selling it?
Tim,
I am going to upgrade the HDD on my late 2007/early 2008 MacBook.
When I asked my Apple AS centre what the maximum capacity they recommend they told me 320GB.
They said there would be overheating with a 500GB.
Have you heard of any such problems or any other problems after upgrading?
Also, can I ask what you use your MacBook for?
Anonymous, no you can't get a HD with OS X pre-installed as far as I know, but installing OSX on a new disk is quite easy if you have the install disks.
Jochen, Zack, badtzmartin, thanks for the info!
anonymous, if you would had been using TimeMachine, you would have been backing up your system on an external HD (HD #1). If you would then install a new bigger HD (HD #2) in your computer, install a clean OS and then restore the newly installed OS with your data from the external HD (HD #1) that was backed up with TimeMachine. You would still have the old HD (HD #3) from inside the Mac. If you wanted to recover some costs from HD #3, you would have to scrub the data, etc. However you wouldn't be able to sell it as an external HD of course.
cjewelz, thanks for bringing this info to light. Read the warning I added to the blog post. I use my MacBook mostly for Java coding and digital photography.
Just finished this up on mine - 320GB HD now. Worked like a charm - Thanks!
I followed your instructions just like you said and now I am getting the 'question mark' folder when booting up. I can get around this by holding down the option key, so my new HD isn't lost, but I would like to figure out how to boot it up normal instead of having to do this extra step. If so I will retry and do it all over again, but I was wondering if anyone new a quick fix for this before I install Logic, which was the reason for the new HD.
Daniel G., glad it worked for you!
Aaron, I really don't know what to tell you or have an idea for a quick fix. The hard drive itself may be the problem. If I were you I would search Google to find a hint of what you could try. Other than that, like you said, re-doing it from the beginning being careful to not miss any detail might be the trick. Good luck!!
Aaron what u need to do is tell your computer which is your bootable HD is as easy as just selecting it.
Thank you - followed this exactly and now I am up to 465Gb with a WD Scorpio Blue!
I just wanted to stop by and say I have NEVER ever worked on the inside of my computer before, and this totally worked like a charm. I have Western Digital 320GB drive in an "early 2006" macbook and it is wonderful (so far, don't you worry, i'll be back if something goes wrong!!). I went the internal harddrive plus external enclosure route to do this.
i am a little paranoid, because i had to open her up three times to get it going (i thought i could just use pliers, but i ended up getting a Torx T8 screwdriver. much quicker & simpler for me) and i never used a ground wrist strip - just followed the apple directions of touching the chassis. we'll see if this screws me!
it took 1 hour to copy all my files from my old 80gb drive and maybe 10 minutes total to do the install itself, once i had the right tools. it is amazing to have this much more space! and it runs a bit faster too (7200rpm now!).
Thank you!!!! :)
I used the 500GB Scorpio and case you recommended. Has worked like a charm for several months now. Thank you for an unbelievably brilliant mod.
Dave
Tim,
I am about to do this to replace the 160g hd in my black macbook. Will the new WD 1TB 7200rpm work? I do not need that much but what the heck. I need to be sure of the correct part number for my online order. 2nd question, I have Windows XP that I want removed from my HD. Is there a thread/FAQ for that procedure? thx pat willcox
V, Amie, Dave, Glad it worked for you! Thanks for leaving a comment!
Pat, I would be cautious about installing a 1TB HD. I think there are some issues with the HD controllers in the Macbooks limiting how much data can be written to the HD. It's not clear to me yet what exactly the limitations are, if any. If you call Apple and find out, please leave a note reporting what they say. :) Removing XP? I don't know, sorry.
Tim thanks for the great post. I'd like to share my experience regarding the first disclaimer at the beginning of the article:
November 2008,I installed a passport 500GB drive on my 2G MacBook Black [Core 2 Duo 2.16] as per your directions; It worked perfectly for a while but then I had the following glitch:
Every time I traveled by plane (I don't know if it was a coincidence or just some random factor of air travel e.g [Pressure, Security Scanners] ) Upon arrival my HDD would die... The computer would not boot up and I could not read the drive even when mounted externally. Thankfully I had kept my HDD old HDD in the Passport Enclosure Which I had kept as is.. in case of emergency [Again Great Suggestion] And decided to switch out HDDs.
A couple of days after I was trying to salvage some info from the old drive and decided to swap it out for good measure and voila! it worked again [My 500GB HDD that is]. So I took some precautions thinking the Drive would die again. But it didn't ... for a few months When I had to travel again. Then once again upon arrival - Dead.
This happened 3 times until I decided to keep the drive as external drive. The last time it happened I visited an apple store told them the problem and my experience. They claimed that the controller would only allow up to 250BG for my model and thus it would continue to malfunction if I stuck with the 500GB drive, and could even cause the controller to fry.
Anyway I wanted to share this with you and your readers... thank you again for an excellent post.
David
David, thanks so much for taking the time to share your experience. I'll direct the readers to your comment. Do you know by chance if you were approaching having ~250GB of data on your hard drive and that is what triggered the problems? Or were you for sure still well below that or even perhaps above it? I'm curious if that amount of data on the 500GB correlates to when the HD encounters problems.
Tim.. yeah actually I was a bit over the 250GB Spectrum. Allthough at the time I had it partitioned it in two using the second partition for windows..
so it seems the syntoms match your prediction in the opening comment:
I guess this means that when my 500GB HD fills up to ~250GB, weird stuff will occur and my HD will possibly be corrupted and un-useable.
With the exception that mine would revive after a couple of hours left alone.
Thanks for the instructions. I bought a 500 GB 2.5 inch SATA drive and the MacBook wouldn't recognise it.
I have an external 500 GB USB hard drive. I took that apart and found that it contains a 3.5 inch SATA drive, and I was able to plug the 2.5 inch drive in instead, to partition it. The plugs are exactly the same. There was nothing to hold the drive in place but I just left it on the floor while partitioning.
Then I fitted the 2.5 inch drive to the MacBook and installed the OS from DVD, and put the external drive back together.
David, Thanks for leaving your feedback, it's very helpful. I created a new article encouraging a 250GB upgrade for MacBooks: MacBook Hard Drive Upgrade Instructions I'm hoping I'll eventually find some info about the exact upgrade limitations, why they're caused, and which MacBook models can be upgraded to what capacity.
Malin, nice thinking! I didn't know the SATA connectors were the same, but I guess it makes sense. Thanks for leaving the info!
Tim, you are making many people very happy. Hopefully I can retroactively fix my issues.
I have a 2.2 MB white w 120 GB HD, runs fine, and a 1.83 1st gen MB w dead HD.
I (long before I found this thread) cloned a new 250 gb HD off the newer MB, took out the 120 mb drive and put it in the old 1.83 MB. Works fine, I'm using it now.
The cloned 250 gb drive did not work in the 2.2 MB, so I cloned the drive again on another (500 gb) drive I was going to use for back-ups as an external drive. That had several partitions on it for future back-ups of different drives.
Questions:
a) I'm not sure if made the partition map as GUID. How can I check this? Disk Utility? Should the clone work (though not upgradeable) if I did use Apple partition map? I did clone to two different drives, a
b) Will a cloned drive w add'l partitions still work correctly as a start-up drive? Only one new has the cloned Leopard OS on it.
c) Any issues w swapping a cloned drive to a different spec machine w different hardware (i.e. 2.2 Core2Duo w superdrive etc to 1.83 core duo w non-working CDRW drive.
d) the external drive is USB only, any issues there? Can I use the ext drive for a start-up drive, using the option key when starting (did that, and didnt' work, leading me to believe the clone is faulty. I don't want to yank the HDs in and out too many times, so haven't tried the original 120 gb drive back in the newer MB yet, nor the cloned drives in the older 1.83 machine...
Thanks in advance, and I will post my results, and what the end issue was, if I do find out.
Daniel, I don't know the answers to your questions because I never worked through troubleshooting a situation as your described. It would be great if/when you did figure it all out, you wrote an additional comment because I'm quite curious what the solution will be and it will probably help out others with similar circumstances. :)
Ah, finally. I read this blog a year ago, bookmarked it and bought a WD HD. After lots of procrastination (due to school and general fear of flopping, this is my first time cracking open my comp!) I finally did it!
I was nervous and found the toughest part to be the very beginning, getting the new HD (which was bought 1 yr ago, so it WAS a two-piece) to slide out of the plastic shell; heck I cut my finger trying to use my SwissArmy blade to pry the shell out. Despite being slightly nervous, the instructions were clear and it went smoothly. The instructions were especially helpful in removing the PCB USB, which was oddly secure; being clueless I might have just yanked and destroyed it, thankfully I didn't.
It went back in and I'm enjoying a roomy +320GB HD!
Thank you so much! Keep it up!
Has anyone who dropped in a 7200rpm drive experienced overheating or other issues?
so i was wondering if u can install a 1 tb into a macbook, im really curious, if anyoone has done this already please email me, grimreaper00108@yahoo.com. thanks
Tim, This post was a big help for me on my recent upgrade. Thank you! As a matter of fact you inspired me to start my own blog with the same upgrade you have listed but I restored the drive by way of a network Time Capsule. Your more than welcome to give me your honest opinion of it at http://macandpcspot.blogspot.com/
Again thank you!
Hi Doug,
Nice work on your blog and on figuring out how to upgrade from TimeCapsule. That will be very useful for people who use TimeCapsule and would rather avoid using third-party software. Cheers!
There is some discussion referencing this blog entry in the Apple Forums.
http://discussions.apple.com/message.jspa?messageID=10821583#10821583
I am just about to return my 500GB drive when I came across those posts that say that there isn't a limit.
hi bluecomet,
Thanks for bringing that to my attention. After reading the discussion it seems like some people believe there should be no limit. They could be right, and I could be wrong, but...
You asked "Anyone have a fullish 320 or 500 gig drive in a macbook like mine?", but no one directly answered that question. And that is the key question. I for one would love to know the answer. I fully agree that the install will be successful. But does anyone out there have a late 2007 Macbook containing a 500GB drive with more than 250GB of data on it?
I can only say what I've experienced and there are 4 reasons why I am still not convinced that there is NOT a 250 GB limit.
1. An Apple employee in Munich working at the Genius Bar after looking into a problem with my Macbook said that there is a 250GB limit with the Macbook I had, but there was no limit for newer models. At the time of the problems, it had a 500GB drive and around 250GB of data.
2. After talking to Apple, I brought it home, put in a 250GB drive and never had a problem since.
3. As an experiment, I installed a 320GB drive and added data until around 250GB. After some time the computer was acting funny during bootup and eventually I noticed in DiskUtility it said my HardDrive had fatal errors. I now have a 320GB brick in my desk drawer.
4. A person named David left a comment above that he was having problems around the 250GB as well and that "This happened 3 times until I decided to keep the drive as external drive. The last time it happened I visited an apple store told them the problem and my experience. They claimed that the controller would only allow up to 250BG for my model and thus it would continue to malfunction if I stuck with the 500GB drive, and could even cause the controller to fry".
That's why I put the warning out there for people who come across this article. Like I said, I could be totally wrong about it, but having the experiences and comments I've had, I felt an obligation to warn people about a potential problem.
So the question remains: Does anyone out there have a late 2007 Macbook containing a 500GB drive with more than 250GB of data on it? I sure don't.
To anyone reading this that did the install, what has your experience been?
Bluecomet, would you be willing to fill up your drive and see what happens and let us know?
Apple, would you be willing to make an official statement about any HD upgrade limitations, saying that they DO or DO NOT exist, and if so what models are affected?
Thanks for share good post. I like this post. I am follow you.
Thanks for this tut! Just found it today.
Yesterday I ordered a WD 320GB 7200 RPM to replace the 80GB in my 2.0Ghz MacBook 1,1 white 13" laptop.
I spoke to the techs at OWC and asked if there would be a problem upgrading to 7200 RPM from the OEM 5400 RPM drive, would it cause overheating, burn out components, etc.
The response was no, that it would be fine. But I've no way of knowing if they have any real info on that or if they are making an assumption.
After reading thru the posts here I have two questions.
Has anyone responded about whether the 250GB HD limitation is real?
And is there a danger to installing a 7200 RPM drive on a machine that had an OEM 5400 RPM drive?
If there really is a HD size limit I'd rather send the new 320GB drive back for a 250GB 5400 RPM drive.
Anonymous, Besides the problems I've personally experienced, one other person has left comments about having problems. I haven't seen any proof that someone had more than 250 GB of data on their macbook yet. About installing a HD with a faster spin, I don't know if that's OK or not. Maybe someone will see your comment here and reply. Otherwise you could post your question on a mac forum somewhere.
I returned the 7200 rpm 500GB drive and ordered a 5400 rpm 320GB one. It is now partitioned as 200GB and 100GB drives. Will keep you all posted as soon as I complete installing.
While my upgrade doesn't exactly speak to the issue of 250GB+ upgrade, I thought I might make note of my recent upgrade experience.
In January, my Apple Care ran out on my MacBook (January 2007, Intel 2 GHz Core 2 Duo). With a tax rebate coming in and the desire to make my MacBook last longer before I go out and buy another one, I decided to do a two part upgrade. The first is to expand my hard drive space. The second is to upgrade to a solid state drive for Mac OS X and applications.
I decided to forgo having an optical drive and use the space for a second hard drive using the Optibay by MCE (http://www.mcetech.com/optibay/index.html). I don't know if they sent the wrong installation instructions or if they don't actually have instruction for white/black macbooks, but I used the Optical Drive replacement guide from ifixit.com (http://www.ifixit.com/Guide/Repair/Installing-MacBook-Core-2-Duo-Optical-Drive-Replacement/518/1) I certainly couldn't have done it without a guide, especially since it involved removing and replacing about 24 screws. I was concerned about getting a drive over 250GB, but threw caution to the wind and went with a 640GB Western Digital Scorpio Blue. After installing my new second hard drive, I threw 300GB+ of data onto it, hoping I could still RMA it if I bricked it in the first week of owning it.
It appears to be working fine, but I also realize that it isn't connected through the primary SATA port on the motherboard and I'm not running OS X off of it. I guess I could put OS X on it, but will image my factory 80GB when I upgrade it to a SSD.
Update on my Macbook - I installed the 320GB drive and the first thing I noticed after booting it up was that the CPU fan was running full blast and that Apple Mail was running the CPU at 100%. It recurred a few times and I followed the instructions at the link below regarding Mail maxing out the CPU and causing overheating, and the problem has since never returned.
http://reviews.cnet.com/8301-13727_7-10330505-263.html
Not sure if I had caused it or not as I did not close Mail before initiating the backup, but all seems fine now after that fix.
Hi, in mid 2009 a replaced the hard drive in my late 2007 black macbook with a 500GB 7200 RPM Seagate drive I bought from Macsales. Everything is working 100% OK, even though I've had the drive full (460GB) for the past few months. No acting up or any inconsistencies.
At one point I had trouble with the Macbook running hot, but that was because over the years a lot of dust had clogged ventilation. I took it apart, cleaned it and have had no more problems with over heating. (iStat Menus reports temperatures OK)
Just though I'd chime in with my experience with a 500GB disk.
Does anybody know if the hard drive from the iomega prestige portable (http://www.externalharddrives.org.uk/iomega/iomega-prestige-portable-hard-drive/) can be used to upgrade Macbook's (white) internal hard drive. I bought the WD passport but had to return it because the USB was welded into the drive.
Thanks.
Bluecomet, Thanks for the updates on your progress. Please drop a note when you get more than 250 GB of data on the drive. I guess you won't have any problems since you partitioned the drive into to partitions.
Noah, wow, I have no idea there was a kit out there for adding an extra hd in the optical drive space. Thanks for bringing that to my attention and sharing your experience.
Steve, Thanks so much for leaving a comment about that. Did you by chance partition the drive into two partitions? Or is all the 460 GB on a single partition?
Anonymous, Sorry, I don't know if that one will work or not.
This is a great hack.
I have been using a 500GB HD for more than a year now with no problems. I think I started using more than 320 GB of the HD c.6 months ago and have had no trouble at all though I would not be surprised if people found differently.
Keep things backed up.
Well, Im willing to be a guinea pig, I have a mid 2007 macbook, and I just upgraded it to a 500gb hard drive and 4gb of RAM. I just partitioned it as 1 partition and am installing Snow Leopard. I'll easily be able to fill up 350gb+ tonight so we'll see what happens, lol.
after having tested it fairly extensively having filled up roughly 350gb of 500gb on my mid 2007 macbook, everything has been OK. if i remember, will post in another 6mo or let you know if it's still behaving.
Calum, Ron, Thanks for letting me know that you haven't had any problems. It's apparent now that many more people are having luck with the 250+ GB upgrade than people with problems. I'm thinking about tabulating people's successes/failures and making a new post with my findings. We'll see if I get to it...
Post a Comment